Set up multiple displays in your classroom
Home > General > Set up multiple displays in your classroom
Getting started...
- Log into your laptop
- Locate the USB-C cable that is attached to your docking station
- Plug the free end into your laptop
- Right click on your desktop and select Display Settings
What am I looking at?
- The top section of this window will show you how things are currently set up. Each display has a number that is assigned by the system. (You can't change which display gets which number, but you can drag the boxes around to match how they are arranged in the room).
- If you see something like "1|2", this means that two displays are showing the same thing.
- Each display has it's own set of settings. The display that is highlighted blue is the one whose settings you are changing.
- If the number in a box appears grey, the computer is set to not display anything on that monitor.
- The box size and shape will be proportional to the resolution that is set for that display.
Setting things up
These instructions are for setting up the laptop, projector and TV as 3 separate displays. If you want the projector and laptop to show the same thing, see Mirroring your your laptop display with the projector.
- Scroll down to the Multiple displays section and choose the option for “Extend desktop on 1 and 2”
- At this point usually the projector/Smart Board will become your main monitor. Within 15 seconds, click the Keep changes button on whichever screen it appears on.
- Now you can drag your Display Settings window back to your laptop screen.
- Scroll back to the top of your Display setting and you should see something like this:
- Click on the “1” screen if it is not already selected (highlighted blue) and scroll down to Multiple Displays again.
- Click the checkbox for “Make this my main display” if it is not your main display already.
- Now scroll up to the top and select display “2”
- Scroll down to “Display resolution” and choose the option that says “1920x1080” and remember to click “Keep changes”
- Look for the “Advanced display settings” link and click it
- Now click the link for “Display adapter properties for Display 2”
- A new window will open, click on the Monitor tab
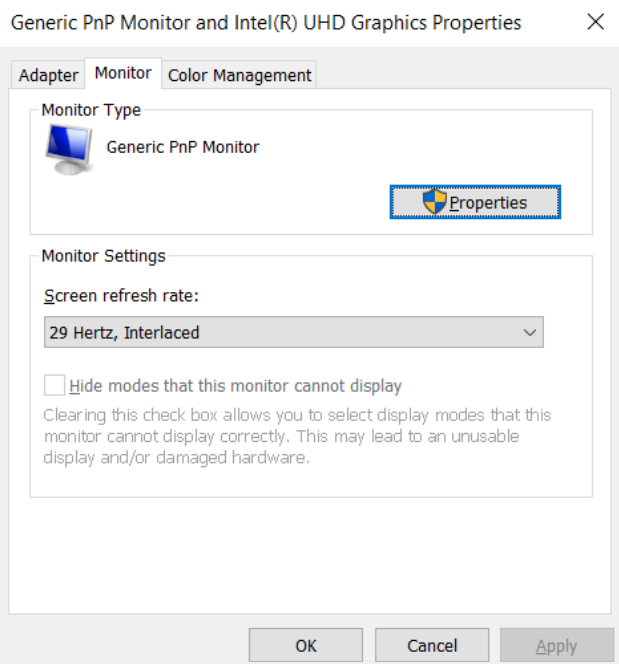
- Locate the “Screen refresh rate dropdown and change it to “60 Hertz” and click OK. Don’t forget to click “Keep Changes”
- Now back at the Settings window, click the Back arrow in the upper left corner
- Click on the “3” display to select it
Scroll down to Display resolution and change it to 1280x1024, and don’t forget to Keep Changes - Note that some projectors may not display the image at the correct size when choosing 1280x1024. If this happens:
- Go to “Advanced display settings” for screen 3, click “Display adapter properties for Display 3”
- Click the “List All Modes” button and choose the option for “1280 by 1024, True Color (32 bit), 75 Hertz”.
- Click Ok, then Ok again and Keep Changes.
- Next, you will want to orient your displays so they make sense for dragging windows. If you drag a window off the left side of your laptop screen, it should flow logically onto either the TV or projector screen. If it feels unnatural, you can rearrange the screen boxes in your Display settings until it feels correct. Depending on your room, you most likely want one of the follow 2 choices:

- Lastly, let’s adjust the Taskbar so that Window thumbnails only appear on the screen where the window is located. This reduced confusion when you have multiple instances of the same program open on different screens.
- Right-click on your Taskbar and choose Taskbar Settings.

- Scroll down to the Multiple Displays section and change the setting for “Show taskbar buttons on” to “Taskbar where window is open”
Last updated: 5/11/2021